Selasa, 23 Mei 2017

Troubleshooting

Do you know what to do if your screen goes blank? What if you can't seem to close an application, or can't hear any sound from your speakers? Whenever you have a problem with your computer, don't panic! There are many basic troubleshooting techniques you can use to fix issues like this. In this lesson, we'll show you some simple things to try when troubleshooting, as well as how to solve common problems you may encounter.

General tips to keep in mind

There are many different things that could cause a problem with your computer. No matter what's causing the issue, troubleshooting will always be a process of trial and error—in some cases, you may need to use several different approaches before you can find a solution; other problems may be easy to fix. We recommend starting by using the following tips.
  • Write down your steps: Once you start troubleshooting, you may want to write down each step you take. This way, you'll be able to remember exactly what you've done and can avoid repeating the same mistakes. If you end up asking other people for help, it will be much easier if they know exactly what you've tried already.
  • Take notes about error messages: If your computer gives you an error message, be sure to write down as much information as possible. You may be able to use this information later to find out if other people are having the same error.
  • Always check the cables: If you're having trouble with a specific piece of computer hardware, such as your monitor or keyboard, an easy first step is to check all related cables to make sure they're properly connected.
  • Restart the computer: When all else fails, restarting the computer is a good thing to try. This can solve a lot of basic issues you may experience with your computer.

Using the process of elimination

If you're having an issue with your computer, you may be able to find out what's wrong using the process of elimination. This means you'll make a list of things that could be causing the problem and then test them out one by one to eliminate them. Once you've identified the source of your computer issue, it will be easier to find a solution.

Scenario:

Let's say you're trying to print out invitations for a birthday party, but the printer won't print. You have some ideas about what could be causing this, so you go through them one by one to see if you can eliminate any possible causes.
First, you check the printer to see that it's turned on and plugged in to the surge protector. It is, so that's not the issue. Next, you check to make sure the printer's ink cartridge still has ink and that there is paper loaded in the paper tray. Things look good in both cases, so you know the issue has nothing to do with ink or paper.
Now you want to make sure the printer and computer are communicating correctly. If you recently downloaded an update to your operating system, it might interfere with the printer. But you know there haven't been any recent updates and the printer was working yesterday, so you'll have to look elsewhere.
You check the printer's USB cord and find that it's not plugged in. You must have unplugged it accidentally when you plugged something else into the computer earlier. Once you plug in the USB cord, the printer starts working again. It looks like this printer issue is solved!
This is just one example of an issue you might encounter while using a computer. In the rest of this lesson, we'll talk about other common computer problems and some ways to solve them.

Simple solutions to common problems

Most of the time, problems can be fixed using simple troubleshooting techniques, like closing and reopening the program. It's important to try these simple solutions before resorting to more extreme measures. If the problem still isn't fixed, you can try other troubleshooting techniques.

Problem: Power button will not start computer

  • Solution 1: If your computer does not start, begin by checking the power cord to confirm that it is plugged securely into the back of the computer case and the power outlet.
  • Solution 2: If it is plugged into an outlet, make sure it is a working outlet. To check your outlet, you can plug in another electrical device, such as a lamp.
  • Solution 3: If the computer is plugged in to a surge protector, verify that it is turned on. You may have to reset the surge protector by turning it off and then back on. You can also plug a lamp or other device into the surge protector to verify that it's working correctly.
    resetting a surge protector
  • Solution 4: If you are using a laptop, the battery may not be charged. Plug the AC adapter into the wall, then try to turn on the laptop. If it still doesn't start up, you may need to wait a few minutes and try again.

Problem: An application is running slowly

  • Solution 1: Close and reopen the application.
  • Solution 2: Update the application. To do this, click the Help menu and look for an option to check for Updates. If you don't find this option, another idea is to run an online search for application updates.
    Checking for updates

Problem: An application is frozen

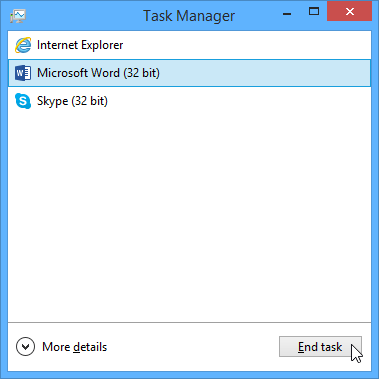
Sometimes an application may become stuck, or frozen. When this happens, you won't be able to close the window or click any buttons within the application.
  • Solution 1: Force quit the application. On a PC, you can press (and hold) Ctrl+Alt+Delete (the Control, Alt, and Delete keys) on your keyboard to open the Task Manager. On a Mac, press and hold Command+Option+Esc. You can then select the unresponsive application and click End task (or Force Quit on a Mac) to close it.
    screenshot of Windows 8
  • Solution 2: Restart the computer. If you are unable to force quit an application, restarting your computer will close all open apps.

Problem: All programs on the computer run slowly

  • Solution 1: Run a virus scanner. You may have malware running in the background that is slowing things down.
  • Solution 2: Your computer may be running out of hard drive space. Try deleting any files or programs you don't need.
  • Solution 3: If you're using a PC, you can run Disk Defragmenter. To learn more about Disk Defragmenter, check out our lesson on Protecting Your Computer.

Problem: The computer is frozen

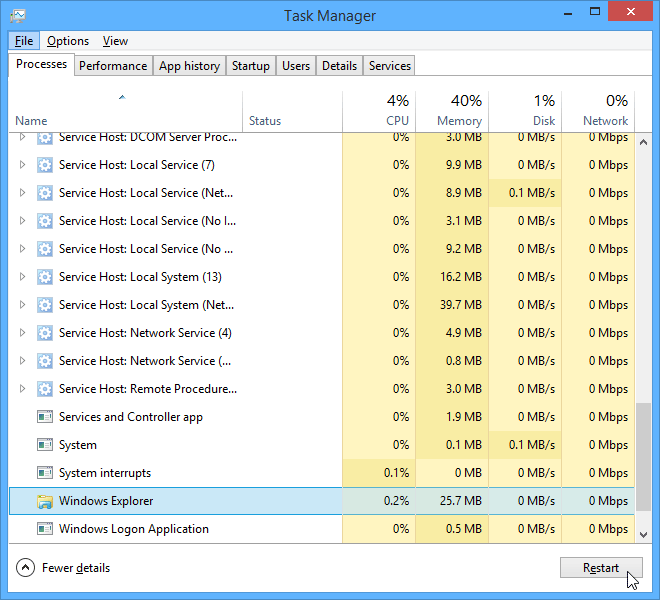
Sometimes your computer may become completely unresponsive, or frozen. When this happens, you won't be able to click anywhere on the screen, open or close applications, or access shut-down options.
  • Solution 1 (Windows only): Restart Windows Explorer. To do this, press and hold Ctrl+Alt+Delete on your keyboard to open the Task Manager. Next, locate and select Windows Explorer from the Processes tab and click Restart. You may need to click More Details at the bottom of the window to see the Processes tab.
    screenshot of Windows 8
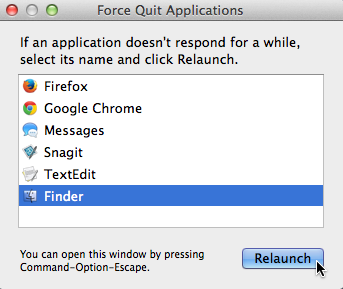
  • Solution 2 (Mac only): Restart Finder. To do this, press and hold Command+Option+Esc on your keyboard to open the Force Quit Applications dialog box. Next, locate and select Finder, then click Relaunch.
    screenshot of OS X
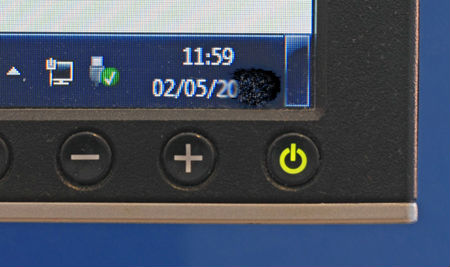
  • Solution 3: Press and hold the Power button. The Power button is usually located on the front or side of the computer, typically indicated by the power symbol. Press and hold the Power button for 5 to 10 seconds to force the computer to shut down.
  • Solution 4: If the computer still won't shut down, you can unplug the power cable from the electrical outlet. If you're using a laptop, you may be able to remove the battery to force the computer to turn off. Note: This solution should be your last resort after trying the other suggestions above.

Problem: The mouse or keyboard has stopped working

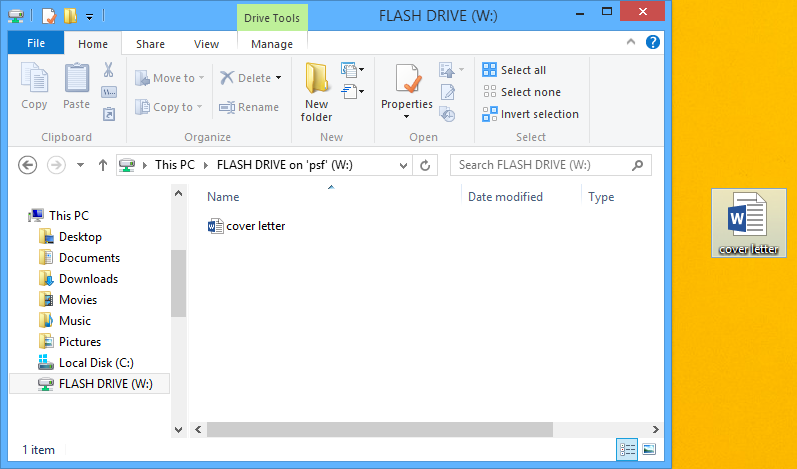
  • Solution 1: If you're using a wired mouse or keyboard, make sure it's correctly plugged into the computer.
  • Solution 2: If you're using a wireless mouse or keyboard, make sure it's turned on and that its batteries are charged.

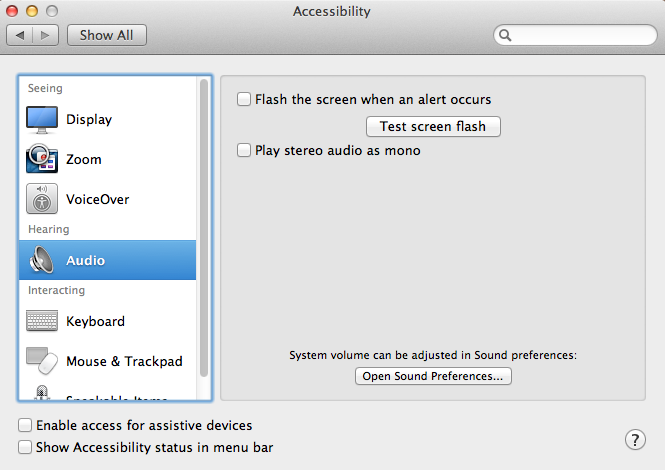
Problem: The sound isn't working

  • Solution 1: Check the volume level. Click the audio button in the top-right or bottom-right corner of the screen to make sure the sound is turned on and that the volume is up.
  • Solution 2: Check the audio player controls. Many audio and video players will have their own separate audio controls. Make sure the sound is turned on and that the volume is turned up in the player.
    screenshot of iTunes
  • Solution 3: Check the cables. Make sure external speakers are plugged in, turned on, and connected to the correct audio port or a USB port. If your computer has color-coded ports, the audio output port will usually be green.
  • Solution 4: Connect headphones to the computer to find out if you can hear sound through the headphones.

Problem: The screen is blank

  • Solution 1: The computer may be in Sleep mode. Click the mouse or press any key on the keyboard to wake it.
  • Solution 2: Make sure the monitor is plugged in and turned on.
  • Solution 3: Make sure the computer is plugged in and turned on.
  • Solution 4: If you're using a desktop, make sure the monitor cable is properly connected to the computer tower and the monitor.

Solving more difficult problems

If you still haven't found a solution to your problem, you may need to ask someone else for help. As an easy starting point, we'd recommend searching the Web. It's possible that other users have had similar problems, and solutions to these problems are often posted online. Also, if you have a friend or family member who knows a lot about computers, they may be able to help you.
google screenshot
Keep in mind that most computer problems have simple solutions, although it may take some time to find them. For difficult problems, a more drastic solution may be required, like reformatting your hard drive or reinstalling your operating system. If you think you might need a solution like this, we recommend consulting a professional first. If you're not a computer expert, it's possible that attempting these solutions could make the situation worse.

Senin, 22 Mei 2017

How to use your computer's built-in help

Everyone needs to look for help sometimes. Luckily, when you want help with a computer program, it’s usually easy to find. Most programs have a help feature somewhere, and learning how to use it can make a big difference. You may not find everything you need, but your computer’s built-in help is a great place to start.
Different programs integrate help features in different ways. Some are like interactive manuals included with the program that you can open with a menu, while others are just links to the developer’s support website. But they’re always designed with the same thing in mind: to help you learn the features of the program and to solve problems yourself.

How to access built-in help

Most programs have one of two ways to access built-in help. For example, Adobe Photoshop Elements has a Help menu with a variety of options. Many of these options open Adobe’s support page in your web browser, while others access features within the program itself.
Help menu in Photoshop
Other programs have a help button, usually near the top-right corner of the window. For example, Microsoft Office 2013 has a small question mark icon that opens the help file.
Help button in Excel

Features of a help file

Help files can be organized in a variety of ways, including as a table of contents, FAQ, or searchable database.
A search box is all you’ll see when you open the help screen in Office 2013. Much like a search engine, you type keywords in the search bar, and it will display topics relevant to the keywords you entered.
Help box in Excel
The table of contents for Mozilla’s support page is a broad list of categories. Clicking any of these hyperlinks will lead to a list of narrower topics and specific help articles. There’s also a search bar at the top-right.
Help page for Firefox
Although built-in help can be useful, it may not always have the information you want. If you can’t find what you’re looking for or don’t understand what you've found, you can usually ask someone you know, do a Google search, or contact support staff. It can take a little extra time and effort, but learning how to find solutions on your own is a valuable skill—and you’ll get better at it with practice

Learning a new program

You ask a friend who is good with computers to help you do something in a new program. The friend says she hasn't used the program before but will give it a try. Two minutes later, she's figured out what to do.
How did she do that? If you've experienced a situation like the one just described, it might seem like magic. But your friend probably just applied what she knew about computers and computer programs to the program you were trying to use. In this lesson, we'll show you how you can do the same thing.

You know more than you think you do!

Starting to use a new computer program can seem overwhelming, but keep in mind that you already know more than you think you know. Even if the screen in front of you looks totally unfamiliar, everything you've learned so far about your computer and other programs will help you figure out what to do next. As you spend more time using the new program, it will start to feel more familiar.

Look for similarities with programs you've used

The first thing you'll want to do when opening a new program is look for familiar features. You may not realize it, but most computer programs have certain basic features in common—so once you've learned to use one program, you'll already know something about any other ones you try to use. For example, many keyboard shortcuts remain the same from program to program.
Most programs also have File and Edit menus, and they'll usually be in the same place: at the top of your screen, either as a drop-down menu or in a ribbon. The File and Edit menus tend to contain similar functions in any program. So if you know the Print function appears in the File menu in Microsoft Word, you'll have a good idea of where to look for it in Google Drive, as in the image below.
google drive screenshot
Even if you're switching from a PC to a Mac or vice versa, keyboard shortcuts will remain mostly the same. Just substitute the Command key on a Mac for the Ctrl key on a PC. For example, the shortcut for the Cut function is Ctrl+X on a PC; on a Mac, it's Command+X.

Check for hidden toolbars or panels

Let's say you've checked your new program for familiar functions, but there are a few you just can't find. Don't give up! If you believe a particular function should be there, you're probably right—you may just need to open it. Many programs have toolbars, sidebars, or panels you can hide or make visible, and they are often hidden by default when you start the program. If you can't find a function you need, try clicking the View or Window menu to check for hidden toolbars, as shown in the image of the Firefox web browser below.
screenshot of view menu

If you're having trouble

If the program you're trying to use has a lot of unfamiliar elements—or if there's a feature you simply don't know how to use—don't despair. There are still some simple things you can do to find your way around a program.

Use the help feature

Software companies know that most users will have questions about how to use their programs, which is why they include built-in help features. You can usually access a program's help feature by clicking a Help menu (sometimes represented by a question mark icon) at the top of your screen. There, you'll find instructions on how to do things, troubleshooting tips, and answers to frequently asked questions. Some help features will even include links to online help forums, where users can post answers to each other's questions. Remember, if something isn't obvious to you, it probably isn't obvious to other users either, so the help section should have some information on it.
screenshot Word help

Google it!

If you haven't found the answer in the program's help feature, try searching for a solution on Google. You will probably find tutorials or posts from other users explaining how to use the program. You may also want to search YouTube for video tutorials on the program you're using.
google it screenshot
For tips on how to search effectively with Google, check out our lesson on Google

Bringing your files with you

When you're working on a document or other computer file, you can always save it to your computer's hard drive. But sometimes you may want to bring your file with you and open it on a different computer. In this lesson, we'll talk about two ways to save your files so you can access them from almost anywhere.

  • Flash drive: Flash drives are small removable hard drives that plug into the USB ports on your computer. They are relatively inexpensive (usually less than $20) and can be purchased at any store with an electronics section.
  • Cloud storage: Cloud storage means you save your files on servers on the Internet using an account with a cloud service. With cloud storage, you can access your files from any computer with Internet access without having to keep track of a physical device.
Flash drives and the cloud can also be used to back up your files. To learn more, check out our lesson on Backing Up Your Files.

Using a flash drive

picture of a flash drive
Flash drives make it easy to carry your important files and documents with you in a portable form. You should always back up the files on your flash drive elsewhere, however, just in case it gets lost or breaks.

To connect a flash drive:

  1. Insert the flash drive into a USB port on your computer. You should find a USB port on the front, back, or side of your computer (the location may vary depending on whether you have a desktop or laptop).
  2. If you're using Windows, a dialog box may appear. If it does, select Open folder to view files. On a Mac, a flash drive icon will usually appear on the desktop.
  3. If a dialog box does not appear, open Windows Explorer—or Finder if you're using a Mac—and select the flash drive on the left side of the window. Note that the name of the flash drive may vary.
    screenshot of OS X

To work with a flash drive:

Once you've connected a flash drive, you can work with it just like any other folder on your computer, including moving and deleting files.
  1. If you want to copy a file from your computer to the flash drive, click and drag the file from your computer to this window.
    screenshot of Windows 8
  2. The file will be duplicated, and this new version will be saved to the flash drive. The original version of the file will still be saved to your computer.
    screenshot of Windows 8
  3. If you want to copy a file from your flash drive to your computer, click and drag the file from this window to your computer.
    screenshot of Windows 8
  4. If you want to remove a file from your flash drive, click and drag the file to the Recycle Bin on a PC or the Trash can on a Mac. A dialog box may appear appear. If it does, click Yes to confirm that you want to permanently delete the file.screenshot of Windows 8
If a dialog box does not appear, you may need to empty the Trash can to permanently delete the file.

To safely remove a flash drive:

When you're done using a flash drive, don't remove it from the USB port just yet. You'll need to make sure to disconnect it properly to avoid damaging files on the drive.
  1. Right-click the flash drive and select Disconnect (or Eject).
    screenshot of Windows 8
  2. You can now safely remove the flash drive from the USB port.
If you're using a Mac, you can also click the Eject button next to the flash drive in Finder to eject it.
screenshot of OS X

Saving files to the cloud

There are many services that allow you to create a free account and save documents, images, and other files to the cloud. Some of the most popular are Google Drive, OneDrive, and Dropbox. The free storage space that comes with these accounts (usually around 15GB) should be plenty if you're using your account for regular personal, work, or school purposes. If you own a business and want to keep all of your documents in the cloud, you may want to pay your cloud service for more storage.
Unlike physical media, the cloud can't break or get lost, so you don't necessarily need to back up the files you keep on it. Files in the cloud are also easier to share so you can collaborate with friends and coworkers. However, when you save something online, there's always a risk that unauthorized users will try to gain access to your personal information. To protect your files, create a strong password and pay attention to the privacy settings and policies of the cloud service you're using.
screenshot of Google Drive
To learn more about services that allow you to store your files in the cloud, check out our tutorials on Google Drive and OneDrive and Office Online.

What are accessibility features?

Accessibility features are designed to help people with disabilities use technology more easily. For example, a text-to-speech feature may read text out loud for people with limited vision, while a speech-recognition feature allows users with limited mobility to control the computer with their voice. In this lesson, we'll introduce you to some common accessibility features. We'll also discuss assistive technology that you can attach to your computer for greater accessibility.

Common accessibility features

Although some accessibility features require special software downloads, many are built into the operating system of your computer or mobile device. Here are just a few types of accessibility features you may already have on your device.
  • Features for blind or low-vision computer users: Features such as text-to-speech allow users to hear what's on the screen instead of reading it. Other features, like high-contrast themes and enlarged cursors, make it easier for users with limited vision to see the screen.
  • Features for deaf or low-hearing computer users: Closed-captioning helps to convey audio information to deaf users in visual form. Mono audio systems transmit right and left audio signals through both earbuds and headphones so users with limited hearing in one ear will not miss part of what they are listening to.
  • Features for limited-mobility computer users: Keyboard shortcuts are convenient for many people, but they are especially helpful to those with difficulty physically manipulating a mouse. For users who have difficulty pressing several keys at once, sticky keys allows them to press keys one at a time to activate a shortcut.
screenshot accessibility menu

Using accessibility features

Most computers and mobile devices come with built-in accessibility features, although they'll usually need to be turned on before you can use them. Let's take a look at how to locate these features for your device.
  • In Windows, open the Settings app (or Control Panel in Windows 8 and earlier), then click Ease of Access.
    opening the Setting app on Windows 10
  • In OS X, open System Preferences, then click Accessibility (or Universal Access in older versions).
    opening the System Preferences on OS X
  • On mobile devices that use Android or iOS, open the Settings app, then locate the Accessibility section. On iOS devices, you'll find it within the General settings category.
    opening the settings app on an Android device

Web accessibility

Most web browsers also offer their own built-in accessibility features. You'll usually find these options in your browser's settings.
opening Chrome settings
Before you adjust these settings, you may want to try zooming instead. Zooming is an easy way to make webpages easier to read, and it works the same way in most browsers. If you're using a browser in Windows, you can zoom in or out by pressing Ctrl+ or Ctrl- (hold down the Ctrl key and press the + or - key). If you're using a Mac, you'll press Command+ or Command-.
To return to the default zoom level, press Ctrl+0 (hold down the Ctrl key and press the zero key). If you're using a Mac, press Command+0.

Accessibility features in specific software

There are many more accessibility features you can use, depending on the type of computer you have and the software you use. The resources below will direct you to accessibility features for some of the most commonly used applications.
  • Microsoft Accessibility: Here, you'll find news on Microsoft's accessibility projects, as well as help pages on accessibility features in the Windows operating system and in the Microsoft Office suite.
  • Apple Accessibility: This is Apple's overview site for accessibility features on Macs, iPods, iPhones, and iPads. From here, you can navigate to help documents for specific features.
  • Google Accessibility: This is Google's help site for accessibility features on Android phones and tablets and in Chrome.
  • Accessibility Features in Firefox: This is Mozilla's official help site for Firefox's accessibility features.
  • AppleVis: This community-based website offers tips, tutorials, and product reviews for blind and low-vision users of Apple products.

Assistive technology devices

As you've already seen, software can do a lot to make computers more accessible for disabled users. However, some accessibility features require extra hardware, or assistive technology. Most assistive-technology devices are similar to keyboards and speakers—they are peripherals that can be plugged into the main computer. Here are some common types of assistive technology you may encounter.
  • Screen magnifiers: Screen magnifiers can be placed over your computer's monitor to ensure the content on the screen always appears magnified. Today, most people use the magnifier or zoom features on their operating systems to view content, but external magnifiers are still available as well.
  • Alternative keyboards: For people who have difficulty using standard keyboards, there are a range of alternative options. For example, users can purchase keyboards with larger keys that are easier to see or press. They can also buy keyboards with alternative key arrangements, including arrangements for people who can only type with one hand or with a limited number of fingers.
  • Switch-adapted peripherals: Switch devices allow people with limited mobility to control technology with very small motions, such as a puff of breath or a head movement. Switch-adapted mice and keyboards make it possible for disabled users to interact with computers even if they are unable to operate peripherals with their hands.
  • Where to buy assistive technology devices

  • Ablenet: Computer Access: Here, you can purchase a wide range of assistive-technology devices. You'll also find information on what types of devices are useful for specific disabilities.
  • Compusult: Computer Access for Physical Disabilities: Compusult offers assistive and other types of technology to individuals and businesses. It also provides training courses on assistive technology.
  • Inclusive Technology: Here, you'll find assistive-technology products, as well as educational software designed for K-12 students with disabilities.

More resources

  • Alliance for Access to Computing Careers: This website offers information on accommodations and accessible design that can be useful for teachers and students in technology fields.
  • My Web My Way: This site was created by the BBC. Here, you can find detailed guides on how to change a variety of settings to make your computer more accessible and easier to use.
  • National Center for Learning Disabilities: Here, you'll find useful information on learning disabilities, assistive technology, and appropriate accommodations for work and school.
  • Tech-Ease 4 All: This site has resources for teachers and parents who want to use technology and computers with disabled students.

How to choose a computer

Is your computer showing its age? Chugging laboriously while loading a website, making videos skip or taking half an hour just to start up in the morning? It’s probably time to get a new one!
 
Or maybe you don’t own a computer at all but have finally decided to join the digital age.
 
Either way, a trip to the computer shop is required, be it on the high street or online. But that can be a pretty daunting prospect – how do you decide from such a dizzying array of choices? This guide will help you through the confusion.
 
Follow these step-by-step instructions on how to choose a computer
 
Step 1: Work out whether you want a desktop computer or a laptop. If you’ll be using it in one place, a desktop will be cheaper and easier to modify, but laptops have the obvious benefits of mobility and smaller size. If you opt for the latter, check out our article Which laptop?
 
Step 2: Decide whether you want a PC or a Mac. There are some obvious and some subtle differences between them – have a look at our more detailed articles on What is a PC? and What is a Mac?). But in general, PCs are harder to use but are cheaper and have more software, and Macs are easier to operate but are more expensive and less software has been created for them.
 
Step 3: Probably the most important step of all: figure out how much money you’re willing to spend. Computers vary hugely in price and it’s easy to spend far more than you intend. You want to get as powerful a computer as possible for your cash, but you probably don’t want to go overboard.
 
Very basic PCs can cost below £200, but these are usually specialist models. Most mid-range PCs will set you back between £200 and £500, with high-end machines much more than that.
 
Apple iMac
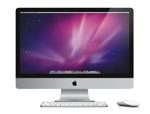
An Apple iMac (left) ranges in price from £899 to £1,999, depending on how powerful you want it to be and how big a screen you prefer. But an iMac is an ‘all in one’ – that is, it’s a computer and screen combined, so you don’t have to pay separately for the latter. 
 
Step 4: Do you need to buy a screen? Also known as ‘monitors’, these can cost almost as much as a PC itself, so if you’ve already got a reasonable one, you might want to save money by sticking with it. Watch out, though – older monitors may not have the modern connectors that newer computers use.
 
If you do decide to get a screen, buy as big a one as you can afford – the difference in your productivity and the sheer enjoyment you’ll get just using your computer will make it worth your while.
 
Step 5: Decide how powerful a computer you need. If you’re planning on using it only for word processing and browsing the web, you can probably get by with a relatively less powerful machine. But if you’re doing some fancy image or video manipulation or want to play the latest games at their best, you’ll need a computer with a lot more heft. More power costs more money, but remember: the more powerful a computer is, the longer it will last before it needs to be replaced.
 
Step 6: You’ll have to settle on how big a hard drive you need. Hard drives are where the information on your computer is stored, and the more information you have, the bigger you’ll want to your hard drive to be.
 
Text files take up a tiny amount of space, so if that’s all you’re keeping, you’ll need hardly any space at all. However, if you’re keeping a large music, photo or video library, you’ll see that space filling up quickly, and if you’re doing video editing, you’ll need a very large hard drive indeed.

Which laptop?

Computers can be cumbersome, and it’s pretty natural to want something smaller that won’t take up too much space on your desk. So for this reason you might consider getting a laptop rather than a desktop model.
 
Or perhaps you already have a desktop machine and need something to carry around with you – say, because you often work away from home or you do a lot of travelling for pleasure?
 
Whatever the reason for the purchase, buying a laptop can be a confusing experience, so luckily we’re here to give you some tips on what to keep in mind when you’re shopping. For more general information on selecting a computer, see our article How to choose a computer.
 
Follow these step-by-step instructions on how to choose a laptop
 
Step 1: Decide whether you want a PC or a Mac laptop. PCs are usually cheaper but harder to use – and vice versa – but you’ll probably want to stick with what you’re already used to. (The prices mentioned below apply to PC laptops.)
 
Step 2: Figure out what you need your laptop for. Decide whether you want to have one as your main computer, one that’s basically a more portable desktop model. In this case, you can buy a laptop that’s a little too large and heavy for easy on-the-go use but has the benefits of power and a large screen. These laptops can cost from £500 to much, much more.
 
Step 3: Decide if you’re looking for a capable machine that you can carry with you on your travels. You’ll probably want one of the mid-range laptops, which usually have screens that are (diagonally) about 13 to 15 inches. These laptops can carry out all the basic tasks as well as allow you to watch videos and even play games – though probably not with all the settings turned on. You can expect to pay around £300 to £400 for this kind of laptop.
 
Step 4: Decide whether you’re only interested in basic web browsing and checking your email while on the go. If so, you might want to consider buying a small and light machine known as  a ‘netbook’. Compared to the other laptops, these are smaller and have less power and they also cost quite a bit less – some are available for under £100.
 
A word of warning, though – netbooks are frequently so low-power that they don’t use the standard Windows operating system, but a special version of of the ‘open source’ Linux one. They are simple to use, however, and should do everything you ask of them well.
 
Step 5: Finally, decide if you might want instead to go for a tablet computer like the iPad. If you don’t intend to do much typing, this could be a better bet than a netbook, especially if you want to do things like watch videos and play games. See our article What is a tablet computer?
 
Person on laptop

What we do

Digital Unite has been providing digital skills support for 21 years. Our customers choose us because they want a cost-effective, proven approach for building digital skills capacity.
We specialise in turning staff, residents and volunteers into effective Digital Champions – people who can stimulate the take up of online services and promote the confident and continued use of the internet.
The Digital Champions Network is our unique and comprehensive training and support system for Digital Champions. It’s trained thousands of Digital Champions across the UK from more than 30 member organisations including 4 local authorities and 17 housing providers.
Learn what’s inside the Digital Champions Network or see how we work with specific industry sectors.


What is Windows?

Windows is a collection of programs known as an operating system (OS) that controls a PC (personal computer). First produced by Microsoft in November 1985, it has been frequently updated since, as computer memory has got bigger, as processing chips have got faster and, of course, when the internet was invented. Prior to Windows, PCs were operated by a series of text commands.
Windows' key benefits and features

  • Allows the user to interact with the computer (through the keyboard, mouse, microphone, etc.).
  • Controls the storage of data (images, files, music).
  • Controls hardware attached to the computer such as webcams, scanners and printers.
  • Helps to open and close programs (word processors, games, photo editors, etc.), and gives them part of the computer’s memory to allow them to work.
  • Controls what access to a computer different users have and the computer's security.
  • Deals with errors and user instructions, and issues simple error messages.
  • Promotes multitasking by allowing the user to do several things on the computer at once – for example, watch a video while writing a letter.
Other operating systems are available, notably the Apple OS X used in Mac computers. In addition, with the increased use of smartphones, notepads and tablets, there are systems aimed directly at mobile devices. However, most people who learn to use computers do so on a system running Windows.

Five top tips for Mac users

Mac computerIf you’re used to using PCs and have recently changed to an Apple Mac computer, there are some subtle differences that you will need to get used to. Once you have got used to these, however, you will probably wonder how you ever coped with the old way of doing it!

 
  1. The keyboard is very different  It may not seem obvious at first glance, but Mac keyboards are different to Windows keyboards, in quite significant ways. For starters, there is only one mouse button, so right-clicking and left-clicking goes out the window. Apple has put together a comprehensive guide (link opens in new window) to the similarities and differences between the two types of keyboard. 
  2. Get protected  Apple machines were historically seen as immune to viruses and malware. Even now, Apple users will often advise each other not to bother running anti-virus software. This is not necessarily sensible advice.
    While the smaller number of Macs to PCs means hackers generally focus their energy on the larger target group (PCs) this does not mean Apple machines are without security flaws. Nothing is perfect, even something as pretty as a MacBook Air. Apple’s browser, Safari, for example, has had several famous flaws highlighted in recent years.
    Sophos offers free tools for Mac home users (link to Sophos for Macs). 
  3. Shortcuts  Shortcuts are your friend on a Mac. And by shortcuts, we mean certain combinations of keys to quickly perform a task. Here are just a few of the basics
    ⌘ + Q = Quit
    ⌘ + W = Close window
    ⌘ + O = Open a file
    ⌘ + P = Print
    ⌘ + C = Copy
    ⌘ + V = Paste
    ⌘ + X = Cut
    ⌘ + S = Save
    ⌘ + Z = Undo
    ⌘ + A = Select All
    Fn + backspace = Delete
    For a fantastic and comprehensive list of shortcuts, www.mactipsandtricks.com has a handy guide.
     
  4. Desktop shortcuts can be very handy
     
    If you’re used to using your computer’s desktop as a dashboard to access files, you may wish to ease yourself into the Mac experience by creating a ‘Documents’ shortcut on the desktop, ditto a shortcut to Mail and Safari. This may clash with Steve Jobs’ vision of a clean, uncluttered desktop, but your layout has to work for you! After a while, you’re likely to be so comfortable with the Mac way of working, that you can ditch these shortcuts.
     
  5. Scrolling, scrolling, scrolling...
     
    The 'Trackpad' on a Mac scrolls ‘naturally’, which is the opposite to the Windows ‘downward scroll’ that you’re used to. This can be unsettling, but it’s easy to change if it makes you more comfortable. Go to Apple key > System preferences > Trackpad System Preference and uncheck ‘natural scroll direction’.

How to complete online forms

Online forms are completed by typing requested information into boxes (also known as ‘fields’) or choosing information from lists which can be presented in various ways. There may also be a range of options from which you can choose by clicking small boxes (called check boxes) or circles (called radio buttons). If you want to enter online competitions, or place online orders, you are likely to come across a lot of these forms!

 
Key features of online forms
 
  • Fields: These are boxes into which you type information.
 
 
  • Drop down lists: These fields have an arrow in them, when you click it you will see a list to choose from. Click an item in the list to choose it.
  • Check boxes: These are small boxes which you need to click in order to tick or untick as required. Watch out for these at the bottom of forms with the ‘small print’. You may also need to tick a box to confirm that you’ve read the terms and conditions of the website and there should be a link to click on e.g. here is a link to the terms and conditions for the DU website http://digitalunite.com/terms-conditions.  Always make sure you read them so that you know what you are signing up for. 
  • Radio buttons: These are small circles which you click to select. The one you’ve clicked will have a dot in it. 
  • CAPTCHA: This is a box with some random letters or numbers in it which you have to copy into the box below. This confirms that you are a human being and not an automated program. To find out more, see our guide What is CAPTCHA?If you can’t read the characters, click the refresh icon  for a different challenge. 
  • Submit button: This button needs to be clicked on to send the completed form. It may say ‘Submit’ or something similar, depending on the purpose of the form. Make sure you click this just once. If you ‘double click’ you may send the form twice.
  • If there is a problem with the form, for example you’ve forgotten to complete an essential field, it won’t be submitted but you will receive an automated message telling you something is wrong and the problem area of the form is usually highlighted in red. You will need to complete that field and submit the form again.
 
Important things to remember
 
  • Never complete personal or bank information unless you have checked that you are on a secure website. The website address should start with https (the ‘s’ stands for secure) and you should see a padlock icon. 
  • The insertion point (or cursor) must be in a field before you can type into it. If it isn’t there, place your mouse pointer in the field and do a left click.
  • The quickest way to move the insertion point to the next field is to press the Tab key on your keyboard, but you can also click into it with your mouse.
  • Don’t press the Enter key until you’ve finished completing the form. If you press it earlier, it may think you’ve finished which means that you will probably have to start again from the beginning.
  • Make sure you only enter the information that is requested. If a question doesn’t apply to you, leave it blank.
  • An asterisk * means the information is essential.  
  • Password, dates, telephone numbers and postcodes usually need to be typed in a certain format e.g. with or without a space. There may be an explanation of what’s required written next to or below the field.
  • Sometimes, clicking an i or ? next to a field will give you information about how to complete it.
  • Clicking an icon like this next to a date field will open a calendar – click on a date to choose it.

How to turn on a computer

Turning on your computer isn’t always easy. Some manufacturers hide the ‘on’ button – for instance, on top of the case or flat on the front where you can’t see it. When you get your computer, don’t be embarrassed to ask: ‘Where’s the “on” button?’

Follow these step-by-step instructions to help you turn on your computer
 
Step 1: Find the ‘on’ button. It probably looks like this (but might be square or oblong!):
 
PC and Laptop on button
 
Step 2: Push the button.
 
On some computers, the button lights up when the computer is on. On laptops, there’s often a light on the front that comes on. You may have to keep pushing for a couple of seconds to make this happen, but don’t worry – you’ll soon get to know how your computer works.
 
If nothing happens, there are a few things you can check easily:
 
  • If you’re using a laptop, the battery might be flat. So plug in the charger, plug the charger into the mains and let the laptop recharge. You can continue to use it while it’s doing this.
  • If you have a PC, make sure that the plug or any of the other wires haven’t become disconnected.
  • Ensure that the monitor is turned on. Most PC monitors have an ‘on/off’ button on the bottom corner of the screen (see below). The button often lights up green when the monitor is on.
Monitor on/off button
 
Step 3: Now you need to log in.
 
If you’re the only user of your computer, once it’s turned on it may go straight to the desktop:
 
Desktop
 
If you’re using a public computer – for example, in a library – you’ll be given instructions (and help if you ask for it) on how to log in.
 
If you’re sharing your computer with other people, each one will usually have their own account. When you turn on the computer, the screen will look something like this:
 
Log on accounts
 
When you click the icon above your name, you’ll be asked for a password. The main user or administrator should set this up for you before you begin. Type in your password and click the arrow.
 
Computer account
 
Done!
 
Top tip: surge protectors
 
If you have a PC, it’s a good idea to buy a ‘surge protector’. This prevents your computer being damaged if there’s a sudden problem with your electricity supply. You can buy surge protectors that let you plug all your separate pieces of equipment into them, in addition to your computer. Then when you turn your computer on or off, this automatically turns them on or off, too.