Compressed files use less disk space so they are easier to store and
quicker and easier to send by email. Files that have been compressed
must be uncompressed before they can be edited.
You’ll need:
- a computer
- a file saved on your computer that you want to compress.
This guide is based on a PC running Windows 7, but the steps in this
process also apply to XP, Vista and Windows, and are very similar for
Mac users.
Follow these step-by-step instructions to how to compress a file
Step 1: Click the Start button in the bottom left-hand corner, and then click one of the library icons Documents, Pictures or Music to see any folders or files that have already been saved. Browse to find the file that you want to compress.
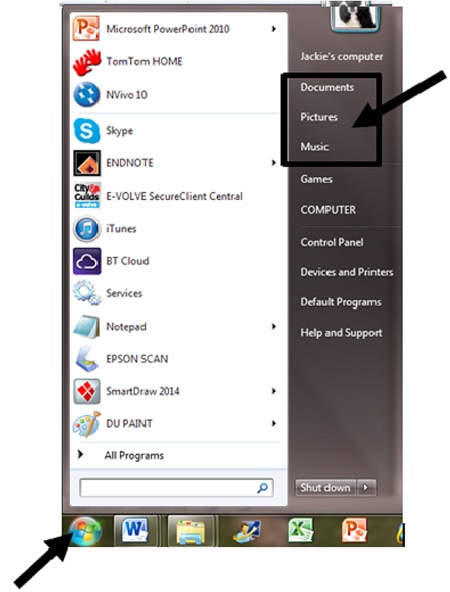
Step 2: If you wish to include two or more files and
they are not already in a folder, you now need to put them into a
folder. To create a new folder, right-click on the screen and scroll
down to New and then to Folder.
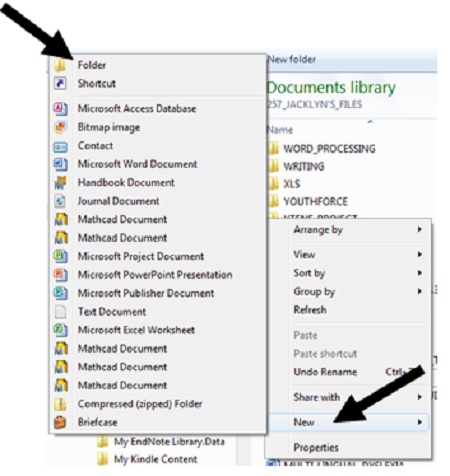
Type in the name of the folder in the space where the text is
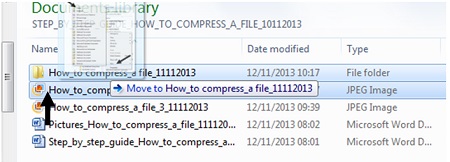
highlighted. Then simply click and drag the file(s) you want to compress
into the new folder.
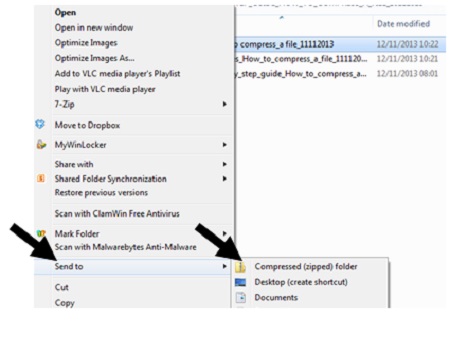
Step 3: When you are ready, right click on the file or folder that you want to compress. Select Send to from the menu which appears and select Compressed (zipped) folder from the list of options.
Step 4: This will create a compressed folder with the
same name as your original folder and in the same location, to which
your files will be copied. (Depending upon the size of your files, you
might need to wait for this process to be completed. In this case a
dialog box will appear to show you the progress of the compressing
files.)
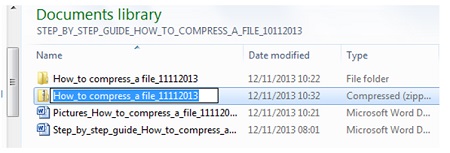
Your compressed file is then ready for storage or to send as an email attachment.
Follow these step-by-step instructions on how to uncompress a file
Step 1: Browse to find the file you wish to uncompress.
Step 2: Right click on the file.
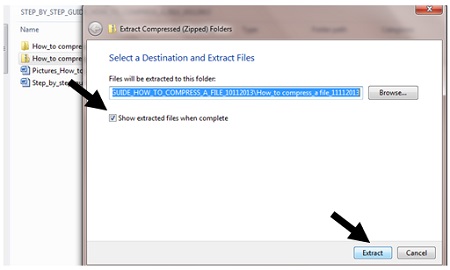
Step 3: Select Extract all… from the menu which appears. This will open the 'Windows Extraction Wizard'. Select Extract.
Make sure that the check box is ticked for show extracted files when
complete. Your folder and its contents will be available to view and to
edit.
Tidak ada komentar:
Posting Komentar