Cortana is a clever little personal assistant that helps you to find things, complete tasks and organise your calendar
Read on to learn how to:
- set up and personalise Cortana
- use Cortana to set up a reminder
- use Cortana to search your computer
How to set up Cortana
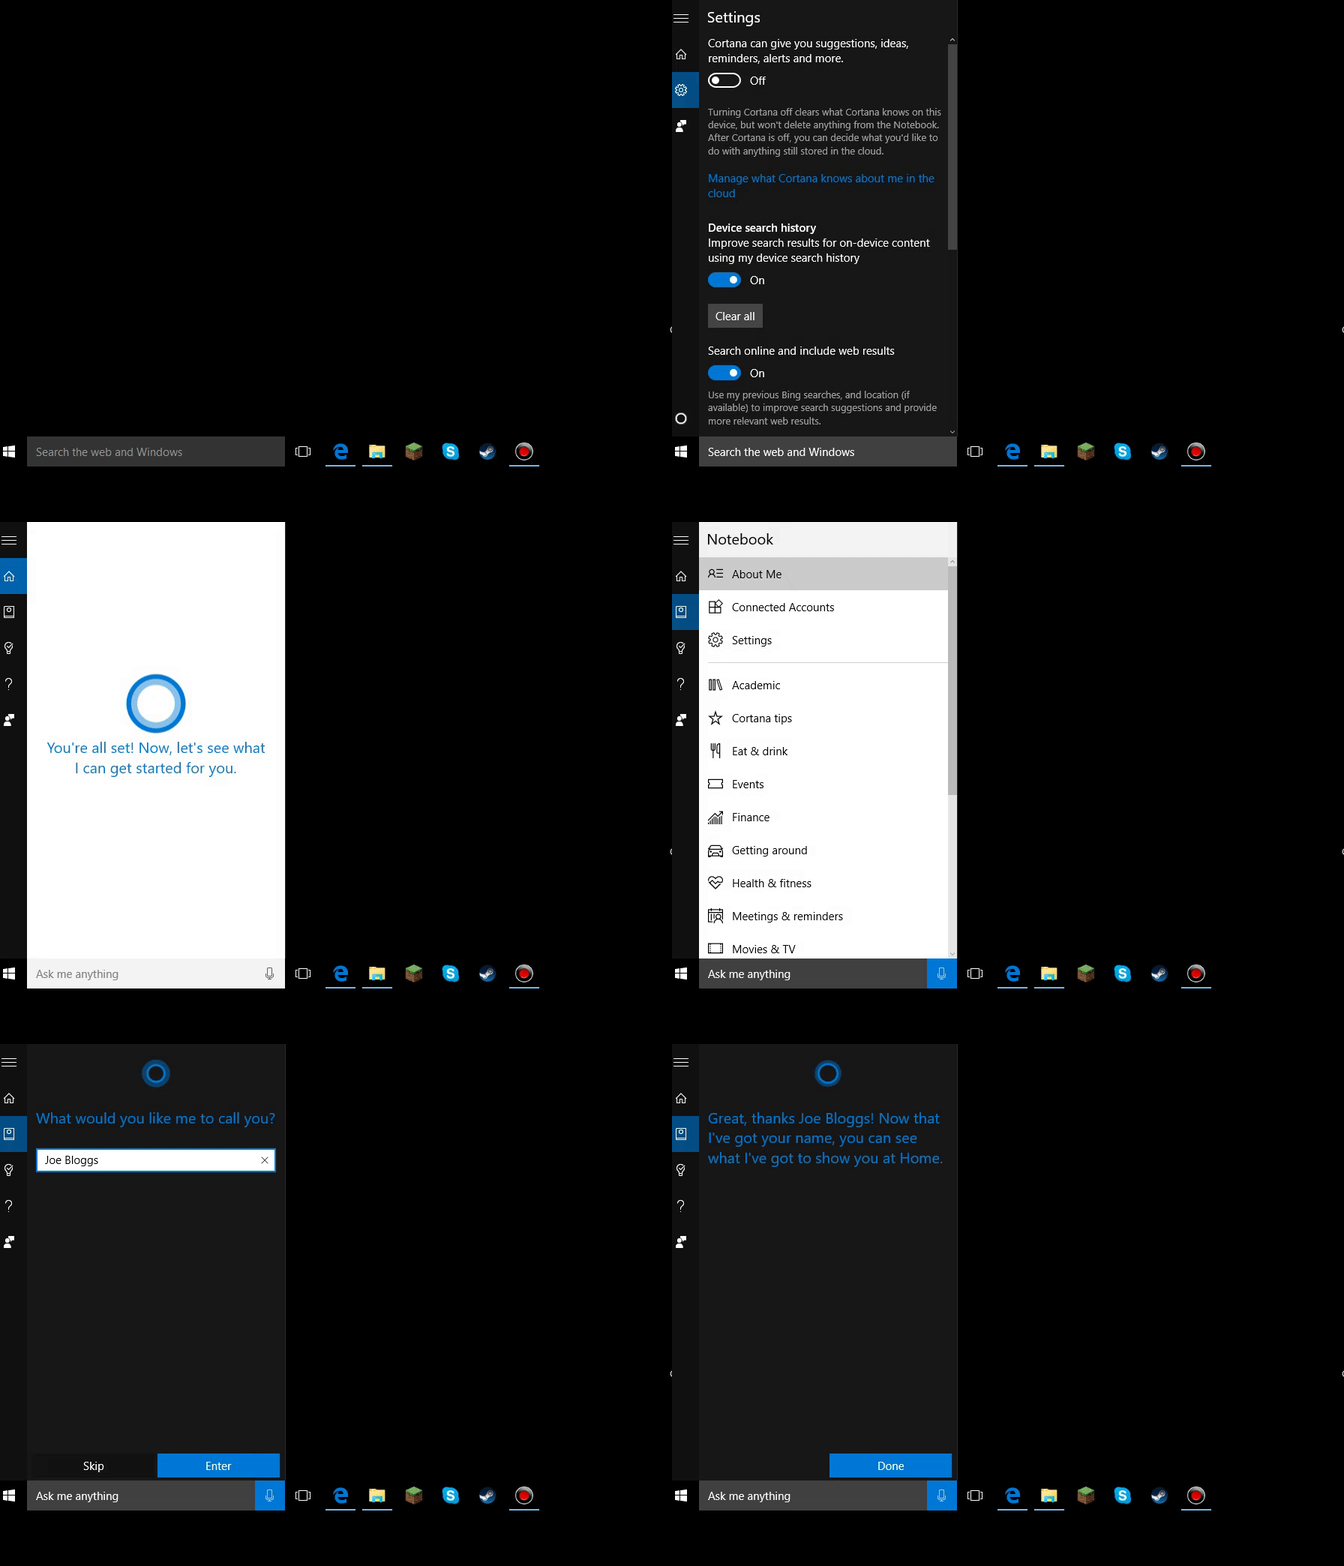
- To set up Cortana, click on the Cortana icon
 in Start
  or click on Start > All apps > Cortana. This will open up the Cortana window.
 - Type in the name you would like Cortana to call you by. You can also fill in details about your preferences, but you can do this later if you prefer.
- If you would like to use voice commands with Cortana, you will need to calibrate the microphone. Click on the microphone icon to the right of Cortana’s search bar and read through the sentences to set up your microphone.
- Cortana will now automatically open whenever you log on.
How to personalise Cortana using the Notebook
- Click on the Cortana search bar at the bottom of your screen. This will bring up Cortana’s window. Then click on the Cortana icon to bring up your Notebook.
- The more information you provide Cortana with, the more personalised your experience will be. Click on ‘About Me’ to change the name Cortana calls you and to fill in your favourite places, such as home and work.
- Work your way down the list of categories, such as events, finance, and news, and update your information for each one. If you don’t want to receive updates about a subject, you can turn them off by clicking on the top button in each topic and you can turn them back on at any time. For example, you might choose to switch on travel updates if you’ve got a trip planned and want to make sure your flight is on time or there aren’t any traffic delays. Once you’re happy with your changes, click ‘save’ before moving on to the next category.
- If you would like to link Cortana to your LinkedIn, Xbox Live, Office 365 or Dynamics CRM, click on ‘Connected Accounts’ and then ‘Connect.’ This will synchronise your accounts across different devices.
- If you decide you want to turn off Cortana, click on the Cortana icon and then go to ‘Settings’. Click on the top button to switch it to ‘off’. Disabling Cortana will not erase the information Cortana has about you, so you can turn it back on again at any time without losing anything.

How to use Cortana to set up a reminder
- Open Cortana and click on the lightbulb icon at the top left.
- Click on the plus sign at the bottom of the window to set up a new reminder.
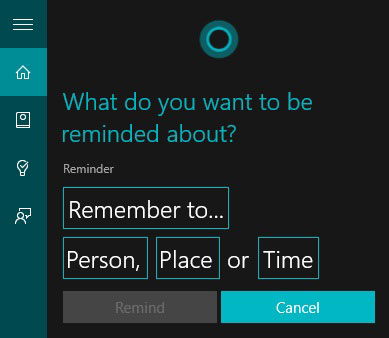
- Type in what you want to be reminded about in the “Remember to…” box. You can also add a person from your contacts list by clicking on the ‘Person’ box, add a place by clicking on ‘Place’ and set a time by clicking on ‘Time’ and selecting the hour and minute.
- You can also set up a new reminder by typing in the Cortana search bar or talk into the microphone, starting with “Remind me to.”
- If you are signed into your Microsoft account on your phone, any reminders you set on your phone will automatically be synchronized across all the devices your Microsoft account is connected to.

Using Cortana to search your computer
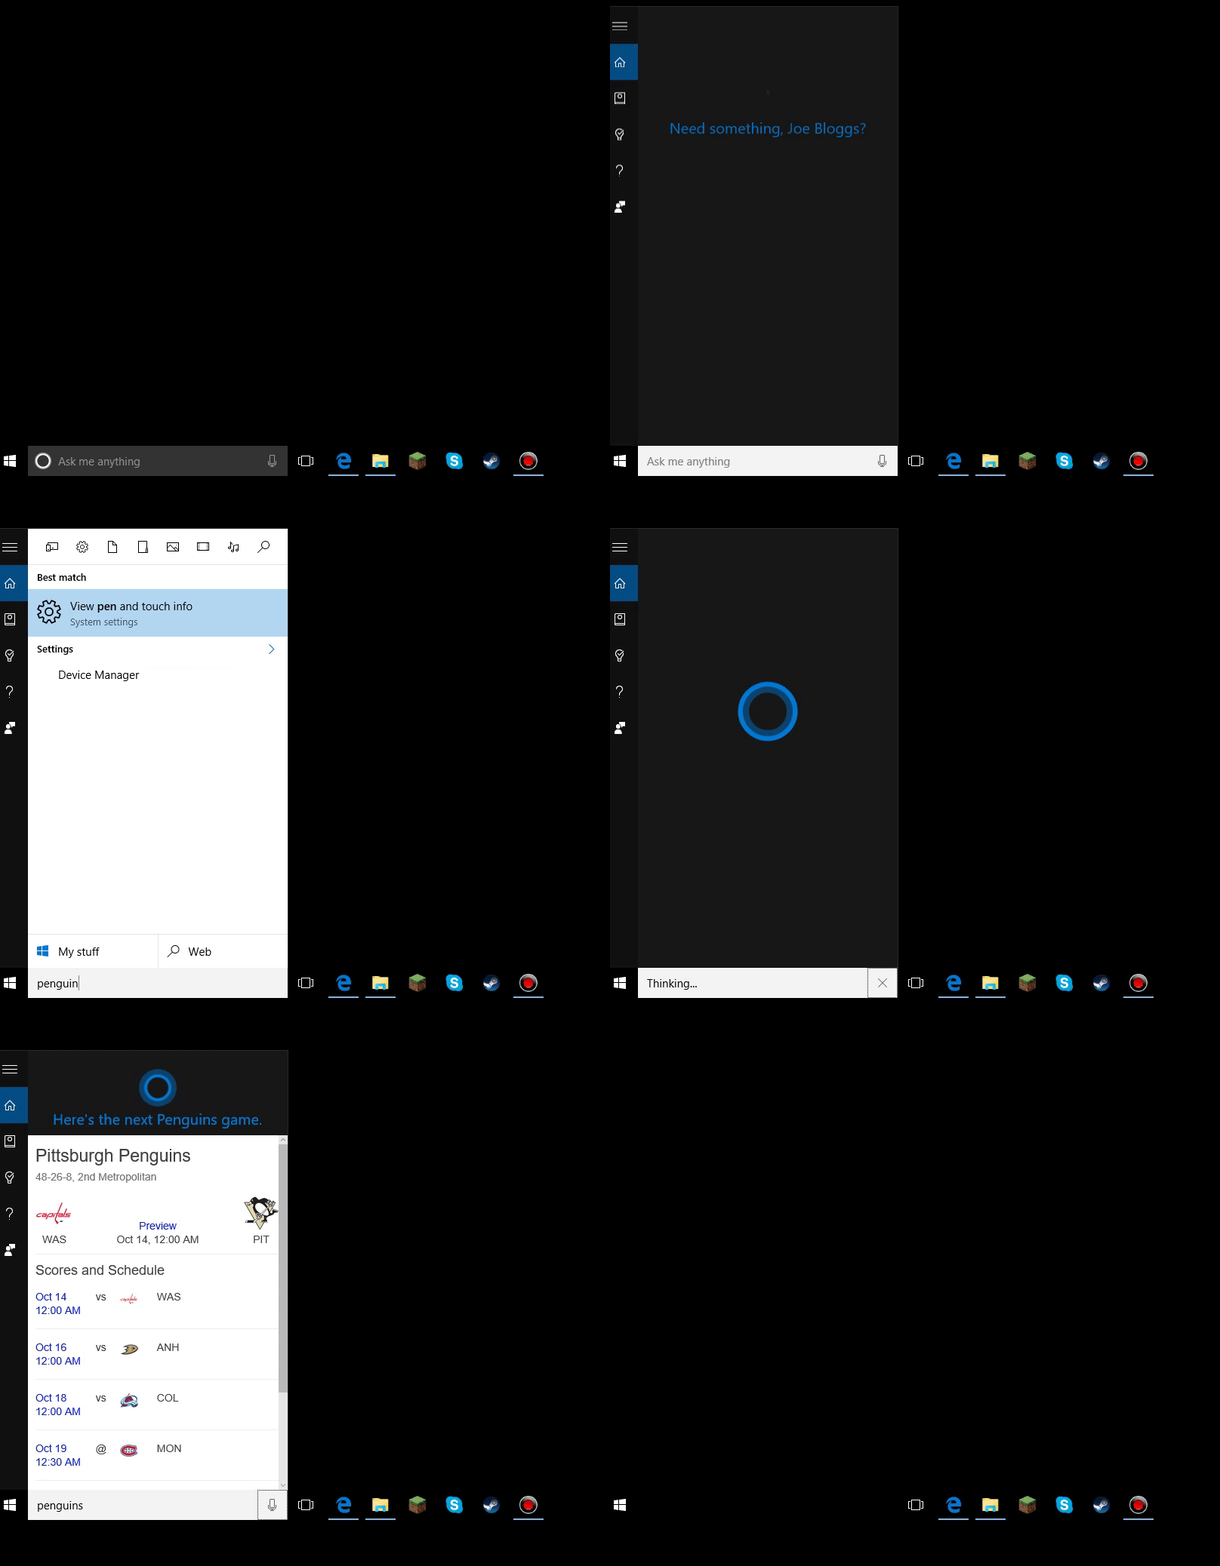
- Click on the Cortana search bar at the bottom left of your screen or click on the microphone icon.
- Type or say the name of what you’re looking for. You can include details such as date or location, for example ‘photos from June’ or ‘photos from London.’
- Click on ‘My stuff’ to see the results for files, apps, photos, videos and music across your PC.
Watch the below to see how it works:
Now we know how to set up and personalise Cortana, as well as use Cortana to set a reminder and search a computer for files.
From here, you might like to learn more about using Cortana to get more out of the internet with Microsoft Edge.
Tidak ada komentar:
Posting Komentar