A back-up is a copy of all the files on your computer. If you have a
back-up, you’re protected if, for example, you delete a precious
photograph by mistake.
It’s normal to back up your files on to a different storage device from
your computer’s hard drive – its main memory store. That way, if your
hard drive gets damaged you can still restore all the information on
your computer and be up and running quickly.
There are basically two types of data that need to be backed up:
- the files that you create and update frequently
- the programs, applications, etc. that make up the ‘system’ that your computer depends on to run and which are updated only occasionally.
You can back up as often as you like – monthly, weekly or daily. But
it’s common to make a large back-up of the entire system and your
folders at the start and, after that, only back up those items that have
changed since the last back-up.
Some computers have a second hard drive built in for back-ups. However,
you’ll be more secure if you store your copies on a free-standing
external hard drive with a very large storage capacity. These can be
bought relatively cheaply. You can then remove this hard drive from your
computer and keep it safe in case of fire or burglary.
Follow these step-by-step instructions on how to back up your computer
This article assumes that you’re using a PC with Windows 7 and have
set up an external drive or similar. Windows 7 has its own back-up
program built in.
Step 1: First, you have to find the Windows 7 back-up
program. Press the ‘Windows’ button on the left-hand side of the taskbar
and type in ‘backup’ in the search box that appears.
On the results you now see, click Backup and Restore:
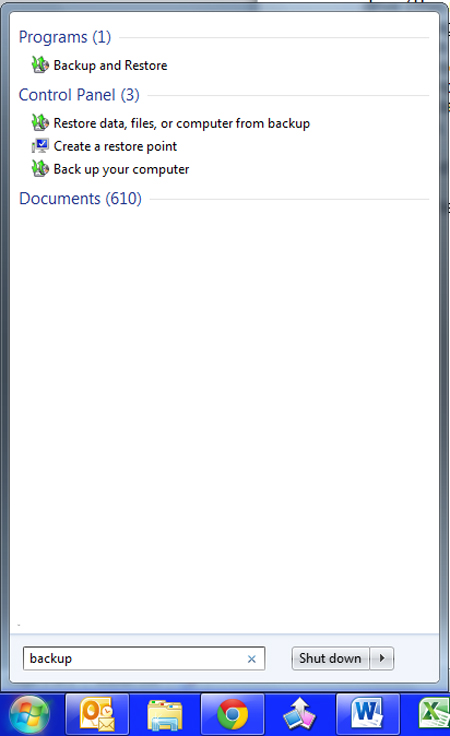
Alternatively, press the ‘Windows’ button and click Control Panel in the right-hand column:
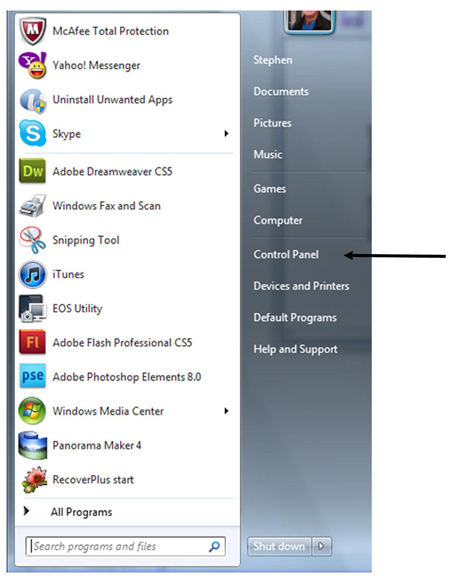
Then click Back up your computer on the ‘System and Security’ menu
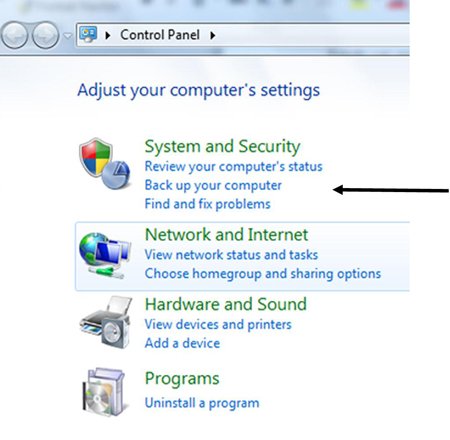
Step 2: No matter which route you took to get there,
you should now have arrived on a page headed ‘Back up or restore your
files’. On this, click Set up backup:
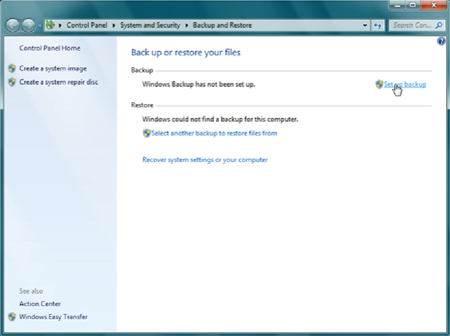
This will open a series of pages.
Step 3: The first page is ‘Select where you want to
save your backup’. This is where you’ll tell the computer to send copies
of all your files and programs/applications.
You’re given a number of choices, depending on which back-up method
you’ve set up. Here the choices are: to send copies to a DVD in the DVD
drive; or, as Microsoft recommends, to send them to an external hard
drive.
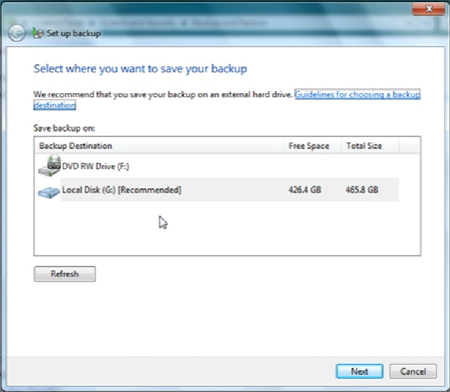
Click on the option that suits you and then click Next.
Step 6: You’ll now see the ‘What do you want to back
up?’ page. Here you can choose what Windows recommends – that is, a
combination of a system copy and back-ups of all your data files – or
you can opt for ‘Let me choose’ and pick only those items you want
Windows to copy:
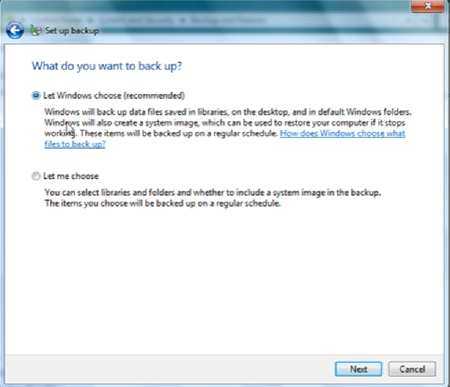
Make your choice and then click Next.
Step 7: You’ve now reached the ‘How often do you want
to back up?’ page, where you can set up a schedule for regular back-ups.
This is highly recommended – it’s very easy to forget to do a back-up!
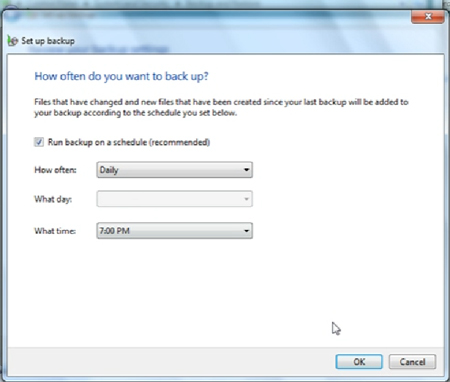
Make your choices and then click OK.
Tidak ada komentar:
Posting Komentar